- Yopitek Ltd/
- Blog/
- ALFA AWUS036ACM: Enabling IBSS Ad Hoc and 802.11s Mesh Networking on Raspberry Pi with MT7612U/
ALFA AWUS036ACM: Enabling IBSS Ad Hoc and 802.11s Mesh Networking on Raspberry Pi with MT7612U
Table of Contents
- What Are IBSS and 802.11s Mesh — and Why Do They Matter? 2. ALFA AWUS036ACM Hardware Specifications 3. The MT7612U Driver on Raspberry Pi 4. Mode 1: IBSS Ad Hoc Networking 5. Mode 2: 802.11s Mesh Point Networking 6. Real-World Use Cases 7. Why the AWUS036ACM Is the Only ALFA Choice for This 8. FAQ and Troubleshooting 9. Where to Buy
ALFA AWUS036ACM: Enabling IBSS Ad Hoc and 802.11s Mesh Networking on Raspberry Pi with MT7612U#
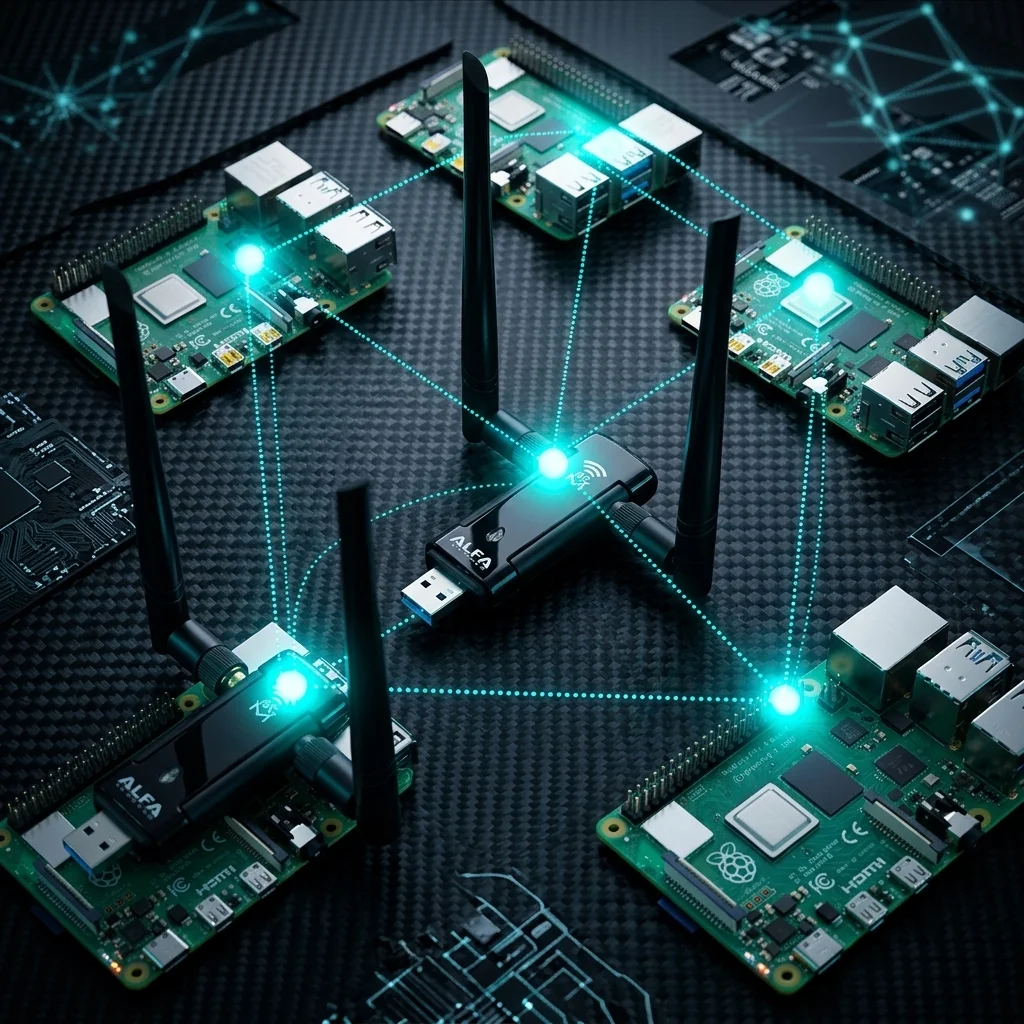
If you have ever tried to build a WiFi network between Raspberry Pi nodes without a router — or create a self-healing wireless mesh that routes traffic automatically through intermediate hops — you quickly discover that most USB WiFi adapters cannot do it. The kernel driver simply does not expose the necessary modes.
The ALFA AWUS036ACM with MediaTek MT7612U chipset is the only current ALFA USB WiFi adapter that fully supports IBSS Ad Hoc and 802.11s Mesh networking on Raspberry Pi, plug-and-play with no driver installation required.
The ALFA AWUS036ACM, powered by the MediaTek MT7612U chipset, is the exception. Its in-kernel mt76 driver implements the complete Linux mac80211 interface, which means it natively supports both IBSS (Ad Hoc) mode and 802.11s Mesh Point mode on Raspberry Pi — out of the box, with no driver compilation required.
This guide explains exactly how both modes work, provides step-by-step setup instructions, and shows you when to choose one mode over the other.
Table of Contents#
1. What Are IBSS and 802.11s Mesh?#
IBSS — Independent Basic Service Set (Ad Hoc Mode)#
When you connect your laptop to a home WiFi router, your adapter is in Managed (Station) mode — it talks to one central Access Point. IBSS is the opposite: it is the IEEE 802.11 specification for peer-to-peer wireless networking with no central infrastructure.
In IBSS mode:
- Devices communicate directly with each other, with no AP or router involved
- Any two devices on the same SSID and channel can exchange data
- The network is self-contained — no internet connection is needed
- IPs are assigned statically (or via a simple DHCP daemon you run yourself)
- The first device to “join” the IBSS becomes the originator of the BSSID (cell identifier)
Think of it as creating an instant private wireless LAN between a small number of Pi nodes — a two-node pipeline, a three-node sensor cluster, or a portable communication kit deployed in the field.
IBSS limitations to know:
- All nodes must be within direct radio range of each other — there is no automatic multi-hop forwarding
- Standard WPA2 encryption is not available in IBSS mode (WEP is technically possible but not recommended; most deployments use application-layer security instead)
- Scales practically to 3–5 nodes before performance degrades
802.11s Mesh Point — The Scalable Alternative#
802.11s is a separate IEEE amendment that defines true wireless mesh networking. Unlike IBSS, an 802.11s mesh:
- Automatically discovers neighbouring nodes and builds a routing table
- Forwards traffic through intermediate hops to reach nodes that are out of direct range
- Self-heals when a node disappears — other paths are used automatically
- Uses the Hybrid Wireless Mesh Protocol (HWMP) for path selection by default
Example: 4-node mesh

  [Pi A] ──── [Pi B] ──── [Pi C]
                │
              [Pi D]

Pi A can reach Pi C via Pi B, automatically.
Pi A can reach Pi D via Pi B, automatically.
If Pi B fails, the mesh attempts to find alternate routes.
802.11s is the right choice when you have more than 3–4 nodes, when nodes are spread across a larger area, or when you want the network to be resilient without manual management.
Why It Is Hard to Find a Working Adapter#
The two modes above require the WiFi driver to be built on Linux’s mac80211 software MAC layer — the official 802.11 stack in the kernel. Only mac80211-compliant drivers expose IBSS and mesh point as usable interface types.
Many popular USB WiFi adapters use out-of-kernel drivers that implement their own simplified wireless stack and deliberately skip IBSS and mesh support. Even some in-kernel drivers for newer chipsets do not expose these modes.
The MT7612U is one of the few chipsets where the answer is a clean, unambiguous yes to both.
2. ALFA AWUS036ACM Hardware Specifications#
The AWUS036ACM is ALFA Network’s AC1200 dual-band USB 3.0 adapter, designed for Linux power users and embedded developers.

Core Specifications#
| Parameter | Value |
|---|---|
| Chipset | MediaTek MT7612U |
| WiFi Standard | IEEE 802.11 a/b/g/n/ac (WiFi 5) |
| Frequency Bands | 2.4 GHz (2.412–2.472 GHz) + 5 GHz (5.15–5.825 GHz) |
| Channel Widths | 20 / 40 / 80 MHz |
| Max Speed (5 GHz) | 867 Mbps (802.11ac) |
| Max Speed (2.4 GHz) | 300 Mbps (802.11n) |
| Combined Speed | AC1200 (867 + 300 Mbps) |
| USB Interface | USB 3.0 Type-A (backwards compatible with USB 2.0) |
| Antennas | 2× RP-SMA female connectors, 2× 5 dBi dual-band dipole (detachable) |
| USB VID/PID | 0e8d:7612 |
| LED Indicators | Power + WLAN activity |
| Included Accessories | USB 3.0 extension cable, Driver CD (Windows) |
| Dimensions | 62 × 85.3 × 24 mm |
| Weight | 60 g |
| Country of Origin | Taiwan (Alfa Network Inc.) |
Transmit Power#
| Standard | TX Power |
|---|---|
| 802.11a | 20 dBm |
| 802.11b | 23 dBm |
| 802.11g | 23 dBm |
| 802.11n | 21 dBm |
| 802.11ac | 20 dBm |
Receive Sensitivity#
| Standard | Sensitivity |
|---|---|
| 802.11a | −92 dBm |
| 802.11b | −97 dBm |
| 802.11g | −90 dBm |
| 802.11n | −90 dBm |
| 802.11ac | −86 dBm |
Supported Interface Modes (Full List)#
This is the key capability table. The MT7612U / mt76x2u driver supports every major mac80211 interface mode:
| Mode | Supported | Description |
|---|---|---|
| IBSS | ✅ Yes | Ad Hoc peer-to-peer, no AP required |
| Managed (Station) | ✅ Yes | Standard client mode |
| AP | ✅ Yes | Software Access Point (hostapd) |
| AP/VLAN | ✅ Yes | Virtual LAN over AP |
| Monitor | ✅ Yes | Passive capture + packet injection |
| Mesh Point | ✅ Yes | 802.11s multi-hop mesh networking |
| P2P-client | ✅ Yes | Wi-Fi Direct client |
| P2P-GO | ✅ Yes | Wi-Fi Direct Group Owner |
Wireless Security#
WPA2 / WPA / WEP / WPA-PSK / 802.1X / 64–128-bit WEP
Supported Operating Systems#
| OS | Status | Notes |
|---|---|---|
| Raspberry Pi OS (2020+) | ✅ Plug & Play | Zero driver installation |
| Ubuntu 20.04 LTS+ | ✅ Plug & Play | In-kernel mt76 driver |
| Kali Linux 2019.3+ | ✅ Plug & Play | Full monitor + injection + VIF |
| Debian 11+ | ✅ Works | May need firmware-misc-nonfree |
| Arch Linux | ✅ Plug & Play | In-kernel since 4.19 |
| Windows 10/11 | ✅ Supported | Official driver from Alfa website |
| Android NetHunter | ✅ Supported | OTG USB |
| macOS 11+ / Apple Silicon | ❌ Not supported | macOS 10.7–10.12 only |
3. The MT7612U Driver on Raspberry Pi#
Driver: mt76x2u (Part of the mt76 Family)#
The MediaTek MT7612U is handled by the mt76x2u driver, which is part of the broader mt76 driver project maintained by MediaTek and integrated into the Linux kernel mainline.
The critical numbers:
- In-kernel since: Linux kernel 4.19 (released October 2018)
- Raspberry Pi OS ships with kernel 5.15+ (Pi 4/5) and 5.10+ (Pi 3B+) — both well above 4.19
- No installation step needed on any modern Raspberry Pi OS
How to Verify the Driver is Loaded#
After plugging in the AWUS036ACM, run:
lsusbLook for the entry:
Bus 001 Device 003: ID 0e8d:7612 MediaTek Inc. MT7612U 802.11a/b/g/n/ac Wireless AdapterThen confirm the driver is active:
dmesg | grep mt76Expected output (condensed):
mt76x2u 1-1.4:1.0: ASIC revision: 76120044
mt76x2u 1-1.4:1.0: Firmware Version: 0.1
mt76x2u 1-1.4:1.0: loaded firmware from mediatek/mt7662u_rom_patch.bin
List the new interface:
iw devYou should see a new interface (typically wlan1 if your Pi’s built-in WiFi is wlan0):
phy#1
    Interface wlan1
        ifindex 4
        wdev 0x100000001
        addr xx:xx:xx:xx:xx:xx
        type managed
        channel 6 (2437 MHz), width: 20 MHz (no HT), center1: 2437 MHz
Check the full capability list for the adapter:
iw phy phy1 info | grep -A 20 "Supported interface modes"You will see:
Supported interface modes:
     * IBSS
     * managed
     * AP
     * AP/VLAN
     * monitor
     * mesh point
     * P2P-client
     * P2P-GO
Why the Driver Architecture Matters#
The driver stack for the AWUS036ACM looks like this:
Your Application (ping, iperf3, batman-adv...)
        ↓
nl80211 / cfg80211  ← kernel WiFi configuration API
        ↓
mac80211            ← IEEE 802.11 software MAC layer
        ↓
mt76x2u             ← MT7612U USB hardware driver
        ↓
MediaTek MT7612U    ← Physical chip (2×2 MIMO, USB 3.0)
mac80211 is the Linux kernel’s implementation of the full 802.11 state machine — it handles beacon management, frame construction, power save, IBSS peer discovery, and mesh path routing. Drivers built on top of mac80211 automatically inherit all of these capabilities.
Drivers that bypass mac80211 (out-of-kernel drivers from Realtek, for example) implement only the modes they choose to expose — and IBSS and mesh point are almost always omitted.
4. Mode 1: IBSS Ad Hoc Networking#
How IBSS Works#
In IBSS mode, each adapter manages its own 802.11 frames. When two adapters are set to the same SSID and channel:
- The first device generates a random BSSID (the IBSS cell ID)
- It broadcasts beacons on the chosen channel
- The second device scans, finds the beacon, and joins the cell
- Both devices can now exchange data frames directly — no AP in the middle
From the OS perspective, the IBSS interface behaves like an ordinary Ethernet interface — you assign IPs and use TCP/IP as normal.
IBSS vs. Managed Mode at a Glance#
| Feature | IBSS (Ad Hoc) | Managed (Station) |
|---|---|---|
| Central AP needed? | ❌ No | ✅ Yes |
| Internet required? | ❌ No | Usually yes |
| Setup complexity | Low | Very low |
| Max practical nodes | 3–5 | Unlimited (via AP) |
| WPA2 support | ❌ No | ✅ Yes |
| Best for | Isolated Pi clusters, field kits | Home/office networking |
Step-by-Step: Two Raspberry Pi IBSS Network#
This example creates a direct 5 GHz link between two Raspberry Pi units. Adjust the IPs and SSID to match your deployment.
On both nodes — identify the correct interface:
iw devThe AWUS036ACM will typically appear as wlan1 (if the Pi’s built-in WiFi is wlan0). Confirm by checking the MAC address against lsusb. In all commands below, replace wlan1 with your actual interface name.
Node 1 (Pi #1 — IP: 192.168.88.1)#
Step 1 — Stop NetworkManager / wpa_supplicant from interfering:
sudo systemctl stop NetworkManager 2>/dev/null || true
sudo pkill wpa_supplicant 2>/dev/null || true
Step 2 — Bring the interface down:
sudo ip link set wlan1 downStep 3 — Set the interface to IBSS mode:
sudo iw dev wlan1 set type ibssStep 4 — Bring the interface back up:
sudo ip link set wlan1 upStep 5 — Join (or create) the IBSS cell on 5 GHz Channel 36:
sudo iw dev wlan1 ibss join RaspberryMesh 5180Frequency reference:
- 5180 MHz = 5 GHz Channel 36 (common indoor channel, good throughput)
- 5200 MHz = 5 GHz Channel 40
- 2412 MHz = 2.4 GHz Channel 1 (better range, lower speed)
- 2437 MHz = 2.4 GHz Channel 6
Step 6 — Assign a static IP address:
sudo ip addr add 192.168.88.1/24 dev wlan1Node 2 (Pi #2 — IP: 192.168.88.2)#
Run the same commands, changing only the IP address:
sudo systemctl stop NetworkManager 2>/dev/null || true
sudo pkill wpa_supplicant 2>/dev/null || true
sudo ip link set wlan1 down
sudo iw dev wlan1 set type ibss
sudo ip link set wlan1 up
sudo iw dev wlan1 ibss join RaspberryMesh 5180
sudo ip addr add 192.168.88.2/24 dev wlan1
Verify the Link#
On Node 1:
iw dev wlan1 linkExpected output (once Node 2 has joined):
Connected to xx:xx:xx:xx:xx:xx (on wlan1)
    IBSS cell ID/AP: xx:xx:xx:xx:xx:xx
    SSID: RaspberryMesh
    freq: 5180
    RX: 1204 bytes (12 packets)
    TX: 852 bytes (8 packets)
    signal: -48 dBm
    tx bitrate: 300.0 MBit/s MCS 15 40MHz
Test connectivity:
ping -c 4 192.168.88.2PING 192.168.88.2 (192.168.88.2) 56(84) bytes of data.
64 bytes from 192.168.88.2: icmp_seq=1 ttl=64 time=1.84 ms
64 bytes from 192.168.88.2: icmp_seq=2 ttl=64 time=1.92 ms
64 bytes from 192.168.88.2: icmp_seq=3 ttl=64 time=2.01 ms
64 bytes from 192.168.88.2: icmp_seq=4 ttl=64 time=1.88 msTest throughput with iperf3:
# On Node 2 (server):
iperf3 -s

# On Node 1 (client):
iperf3 -c 192.168.88.2 -t 10
Making IBSS Persistent Across Reboots#
Create /etc/systemd/system/ibss-mesh.service on each node:
[Unit]
Description=IBSS Ad Hoc Mesh Network
After=network.target
Wants=network.target

[Service]
Type=oneshot
RemainAfterExit=yes
ExecStartPre=/bin/sleep 5
ExecStart=/bin/bash -c '\
  ip link set wlan1 down && \
  iw dev wlan1 set type ibss && \
  ip link set wlan1 up && \
  iw dev wlan1 ibss join RaspberryMesh 5180 && \
  ip addr add 192.168.88.1/24 dev wlan1'
ExecStop=/bin/bash -c '\
  iw dev wlan1 ibss leave && \
  ip link set wlan1 down'

[Install]
WantedBy=multi-user.target
Enable it:
sudo systemctl daemon-reload
sudo systemctl enable ibss-mesh.service
sudo systemctl start ibss-mesh.service
Note: Change the IP address in the service file for each node (
.1,.2,.3, etc.)
Adding a Third Node#
For Node 3, use the same procedure with IP 192.168.88.3. All three nodes must be within direct radio range of each other. To route traffic between Node 1 and Node 3 through Node 2, enable IP forwarding on Node 2:
sudo sysctl -w net.ipv4.ip_forward=15. Mode 2: 802.11s Mesh Point Networking#
How 802.11s Works#
The 802.11s amendment adds a mesh coordination layer directly into the 802.11 MAC. Instead of all nodes talking to a central AP, each node:
- Discovers neighbouring mesh nodes by broadcasting Mesh Beacon frames on the chosen channel and
mesh_id - Runs HWMP (Hybrid Wireless Mesh Protocol) to calculate the best path to each destination
- Encapsulates data frames with a Mesh Header that includes source and destination MAC addresses plus a mesh sequence number
- Forwards frames through intermediate hops automatically when the destination is out of direct range
The Linux kernel exposes this via the mp (mesh point) interface type in iw, and the kernel’s own 80211s implementation handles all the peering and path management.
802.11s Compared to IBSS#
| Feature | IBSS (Ad Hoc) | 802.11s Mesh Point |
|---|---|---|
| IEEE Standard | 802.11 IBSS | 802.11s |
| Multi-hop routing | ❌ Manual only | ✅ Automatic (HWMP) |
| Node range | All in direct range | Extends beyond single hop |
| Scalability | 3–5 nodes practical | 10+ nodes with batman-adv |
| Setup complexity | Low | Medium |
| Self-healing | ❌ No | ✅ Yes |
| Best for | Simple 2–3 node setups | Larger distributed systems |
Step-by-Step: Multi-Node 802.11s Mesh#
This example builds a three-node mesh on 5 GHz Channel 36. Each node automatically discovers the others and establishes paths.
On Every Node — Create the Mesh Interface#
Step 1 — Identify the physical device (phy) name:
iw devLook for the phy associated with the AWUS036ACM (typically phy1):
phy#1
    Interface wlan1
        ...
Step 2 — Add a new mesh point interface named mesh0:
sudo iw phy phy1 interface add mesh0 type mp mesh_id RaspberryMeshThis creates a new virtual interface
mesh0on the same physical radio aswlan1. The originalwlan1can remain in managed mode for internet access simultaneously — this is VIF (Virtual Interface) in action.
Step 3 — Set the operating channel (5 GHz Channel 36):
sudo iw dev mesh0 set channel 36Step 4 — Bring the mesh interface up:
sudo ip link set mesh0 upStep 5 — Assign a unique IP address per node:
# Node 1:
sudo ip addr add 10.88.0.1/24 dev mesh0

# Node 2:
sudo ip addr add 10.88.0.2/24 dev mesh0

# Node 3:
sudo ip addr add 10.88.0.3/24 dev mesh0
Verify Mesh Formation#
Check that peers have been discovered:
iw dev mesh0 station dumpExample output (Node 1 sees Node 2 and Node 3):
Station xx:xx:xx:xx:xx:02 (on mesh0)
    inactive time:  120 ms
    rx bytes:       4820
    tx bytes:       3560
    signal:         -52 dBm
    tx bitrate:     300.0 MBit/s MCS 15 40MHz
    mesh plink:     ESTAB
    mesh local PS mode: ACTIVE

Station xx:xx:xx:xx:xx:03 (on mesh0)
    mesh plink:     ESTAB
Inspect mesh routing paths:
iw dev mesh0 mpath dumpDEST ADDR NEXT HOP IFACE SN METRIC QLEN EXPTIME DTIM DRET FLAGS
xx:xx:xx:xx:xx:02 xx:xx:xx:xx:xx:02 mesh0 32 1158 0 0 100 0 0x4
xx:xx:xx:xx:xx:03 xx:xx:xx:xx:xx:02 mesh0 18 2316 0 0 100 0 0x14Node 3’s next hop is Node 2 — meaning Node 1 reaches Node 3 through Node 2 automatically.
Ping across the mesh:
# From Node 1:
ping -c 4 10.88.0.3
Advanced: Adding batman-adv for Layer-2 Mesh Routing#
For production deployments, replacing the kernel’s built-in HWMP with batman-adv provides more advanced routing, better performance under mobility, and compatibility with higher-level networking tools.
Install batman-adv:
sudo apt install batctlLoad the module:
sudo modprobe batman-advConfigure the mesh interface as a batman-adv slave:
# Bring mesh0 up without an IP first
sudo ip link set mesh0 up
sudo batctl if add mesh0

# Bring the batman interface up
sudo ip link set bat0 up

# Assign IP to the batman interface (not mesh0)
sudo ip addr add 10.88.0.1/24 dev bat0
Check the batman routing table:
sudo batctl n    # Neighbours
sudo batctl o    # Originator table (all known nodes)
sudo batctl tg   # Translation table (MAC → IP mapping)
Making 802.11s Mesh Persistent#
Create /etc/systemd/system/mesh-point.service:
[Unit]
Description=802.11s Mesh Point Network
After=network.target

[Service]
Type=oneshot
RemainAfterExit=yes
ExecStartPre=/bin/sleep 5
ExecStart=/bin/bash -c '\
  iw phy phy1 interface add mesh0 type mp mesh_id RaspberryMesh && \
  iw dev mesh0 set channel 36 && \
  ip link set mesh0 up && \
  ip addr add 10.88.0.1/24 dev mesh0'
ExecStop=/bin/bash -c '\
  ip link set mesh0 down && \
  iw dev mesh0 del'

[Install]
WantedBy=multi-user.target
Enable:
sudo systemctl daemon-reload
sudo systemctl enable mesh-point.service
sudo systemctl start mesh-point.service
6. Real-World Use Cases#
Use Case 1 — Off-Grid Sensor Network (Smart Agriculture / Environmental Monitoring)#
Scenario: Three Raspberry Pi units deployed across a field, each with soil moisture, temperature, and humidity sensors. No cellular or WiFi infrastructure is available.
Setup: IBSS on 2.4 GHz Channel 1 (2412 MHz) for maximum range. Each node collects sensor data and sends it to a central logger node (Node 1) every 30 seconds.
Why AWUS036ACM: The 5 dBi antennas and 23 dBm TX power on 2.4 GHz give the adapter better-than-average range — useful for covering inter-row distances in a field. With optional RP-SMA antenna upgrades (e.g., directional Yagi), range can be extended significantly further.
Sample data pipeline:
[Sensor Pi A] ──IBSS──> [Edge Pi B (logger)]
[Sensor Pi C] ──IBSS──> [Edge Pi B (logger)]
Use Case 2 — Drone / Robot Cluster Communication#
Scenario: Two or three Raspberry Pi-based drones or ground robots need to share telemetry data and coordinate actions without going through a ground station.
Setup: IBSS on 5 GHz Channel 36 (5180 MHz) for low latency and high throughput. Each unit streams 1080p H.264 video at ~5 Mbps plus telemetry at <100 Kbps.
Why 5 GHz: At AC1200 speeds (867 Mbps on 5 GHz), the AWUS036ACM has more than enough headroom for multiple simultaneous video streams. The 5 GHz band also avoids the crowded 2.4 GHz interference common in urban areas.
Topology:
[Drone 1 / 192.168.88.1] ──5GHz IBSS──> [Drone 2 / 192.168.88.2]Use Case 3 — Disaster Response / Emergency Communication Kit#
Scenario: A rapid-deployment team arrives at a location with no infrastructure. Each team member carries a Raspberry Pi Zero 2W + AWUS036ACM + battery pack. Within 60 seconds, a functioning multi-node mesh is active for text communication, file sharing, and coordination.
Setup: 802.11s Mesh on 2.4 GHz for maximum range across buildings and obstacles. batman-adv handles routing so the team does not need to manage IPs manually.
Why 802.11s / batman-adv: When team members move, the mesh topology changes. batman-adv automatically updates paths. No single point of failure.
Use Case 4 — Raspberry Pi Compute Cluster Backbone#
Scenario: A developer runs a Beowulf-style compute cluster using 4–6 Raspberry Pi 4 units. They want a dedicated low-latency interconnect separate from the main Ethernet network.
Setup: 802.11s Mesh on 5 GHz using mesh_id ClusterBackbone. Each node communicates over the mesh for inter-process messaging (MPI, Redis pub/sub, ZeroMQ).
Why dedicated mesh: Separating cluster traffic from the main network avoids saturating the shared Ethernet switch and allows cluster networking even when the main network is unavailable.
Use Case 5 — Security Research Lab / Isolated Test Environment#
Scenario: A penetration tester or security researcher wants to simulate a private 802.11 IBSS network for testing ad hoc-specific vulnerabilities or validating detection tools.
Setup: IBSS on a clear channel, isolated from production WiFi, using the AWUS036ACM’s monitor mode simultaneously via a VIF. One interface in IBSS (participating in the network), another in monitor (capturing all frames for Wireshark analysis).
# Create monitor interface alongside IBSS
sudo iw phy phy1 interface add mon0 type monitor
sudo ip link set mon0 up
# Capture:
sudo tcpdump -i mon0 -w capture.pcap
7. Why the AWUS036ACM Is the Only ALFA Choice for This#
The Decisive Factor: mac80211 Compliance#
Whether a USB WiFi adapter supports IBSS and 802.11s mesh on Linux depends entirely on its driver architecture. Only mac80211-based in-kernel drivers expose these modes. Drivers that implement their own WiFi stack (most out-of-kernel Realtek drivers) simply do not include IBSS or mesh functionality.
Where Every Other Active ALFA Adapter Stands#
| Model | Chipset | Driver | IBSS | 802.11s Mesh | Notes |
|---|---|---|---|---|---|
| AWUS036ACM | MT7612U | mt76x2u (in-kernel ≥ 4.19) | ✅ | ✅ | The only choice |
| AWUS036ACH | RTL8812AU | rtw88 (in-kernel ≥ 6.14) | ✅ (kernel ≥ 6.14 only) | ❌ | New in-kernel driver; no mesh point |
| AWUS036ACS | RTL8811AU | rtl8812au-dkms (OOK) | ❌ | ❌ | Out-of-kernel driver; no IBSS/mesh |
| AWUS036AX | RTL8832BU | rtw88 (in-kernel) | ❌ | ❌ | No Raspberry Pi support |
| AWUS036AXER | RTL8832BU | rtw88 (in-kernel) | ❌ | ❌ | No Raspberry Pi support |
| AWUS036AXM | MT7921AUN | mt7921u (in-kernel ≥ 5.18) | ❌ | ❌ | mt7921u does not expose IBSS |
| AWUS036AXML | MT7921AUN | mt7921u (in-kernel ≥ 5.18) | ❌ | ❌ | mt7921u does not expose IBSS |
| End of Life — discontinued | |||||
| End of Life — discontinued |
What This Means for You#
The AWUS036ACHM (MT7610U) was the previous ALFA adapter that supported these modes — it is now discontinued. There is no other currently-manufactured ALFA USB adapter that provides clean, plug-and-play IBSS and 802.11s Mesh on Raspberry Pi.
The AWUS036ACM is not just the best choice — it is the only choice in ALFA’s current lineup for this use case.
Additionally, the AWUS036ACM offers:
- AC1200 dual-band — supports IBSS/mesh on either 2.4 GHz (range) or 5 GHz (throughput)
- USB 3.0 — full bandwidth utilisation on Pi 4/5 USB 3.0 ports
- 2× detachable RP-SMA antennas — upgrade to high-gain directional antennas to extend mesh range far beyond the included 5 dBi dipoles
- VIF support — run mesh backbone and AP mode simultaneously on one adapter
- Works on Raspberry Pi 3B+, 4, and 5 — consistent across all Pi generations
8. FAQ and Troubleshooting#
Q: My Pi only shows wlan0. Where is wlan1?
The AWUS036ACM interface appears after the adapter is plugged in. Run iw dev after plugging in. If it does not appear within 10 seconds, check dmesg | grep -i mt76 for error messages. On Raspberry Pi OS Lite, you may need sudo apt install iw if the package is not already present.
Q: iw dev wlan1 set type ibss returns “Device or resource busy”
NetworkManager or wpa_supplicant is holding the interface. Stop them:
sudo systemctl stop NetworkManager 2>/dev/null || true
sudo pkill wpa_supplicant 2>/dev/null || true
Then retry. On Raspberry Pi OS with the desktop, dhcpcd may also hold the interface — add denyinterfaces wlan1 to /etc/dhcpcd.conf and restart dhcpcd.
Q: iw phy phy1 interface add mesh0 type mp returns “Operation not supported”
The adapter’s phy name may not be phy1. Run iw dev to check which phy the AWUS036ACM is on and substitute the correct phy name.
Q: IBSS is set up but ping between nodes fails
Check:
- Both nodes are on the exact same frequency (e.g., both
5180, not one on5180and one on5200) - Both nodes have different IP addresses in the same subnet
- There is no firewall blocking ICMP — check
sudo iptables -L - Run
iw dev wlan1 linkto confirm the IBSS cell ID (BSSID) matches on both nodes
Q: The mesh0 interface disappears after reboot
Virtual interfaces created with iw do not persist across reboots. Use the systemd service shown in Section 5 to recreate them automatically.
Q: Can I use WPA2 encryption over IBSS?
Standard WPA2-Personal (PSK) is not supported in IBSS mode by the Linux kernel. For secured IBSS, you can use application-layer encryption (WireGuard, OpenVPN, or SSH tunnels). 802.11s mesh does support SAE (WPA3-style authentication) with wpa_supplicant.
Q: Can the AWUS036ACM be in IBSS and managed mode simultaneously?
Yes — this is what VIF (Virtual Interface) is for. You can keep wlan1 in managed mode connected to your home router for internet access, while adding a second virtual interface in IBSS or mesh mode for the Pi-to-Pi network:
# wlan1 stays as managed (internet)
# Add second interface for IBSS
sudo iw phy phy1 interface add adhoc0 type ibss
sudo ip link set adhoc0 up
sudo iw dev adhoc0 ibss join LocalNet 5180
sudo ip addr add 192.168.88.1/24 dev adhoc0
Q: What is the maximum range I can achieve?
With the included 5 dBi antennas, expect 20–50 m outdoors in open air on 5 GHz, and 50–100 m on 2.4 GHz. By replacing the antennas with high-gain RP-SMA directional antennas (available separately), range can be extended to several hundred metres in line-of-sight conditions. The RP-SMA connectors on the AWUS036ACM are a standard size and compatible with a wide range of third-party antennas.
Q: Does this work on Raspberry Pi Zero 2W?
Yes — the Raspberry Pi Zero 2W has a full-size USB-A port (via OTG adapter) and runs Raspberry Pi OS with a kernel well above 4.19. The AWUS036ACM works there, but note that the Zero 2W’s USB port is USB 2.0 only, limiting bandwidth to approximately 300–400 Mbps in practice. For IBSS/mesh control traffic and sensor data, this is more than sufficient.
9. Where to Buy#
The ALFA AWUS036ACM is available from yupitek.com — the official ALFA Network reseller. Purchasing through an authorised reseller ensures you receive genuine hardware with the standard warranty from Alfa Network Inc.
Product page: ALFA AWUS036ACM on Yupitek
Included in the box:
- 1× AWUS036ACM adapter
- 2× Detachable 5 dBi dual-band dipole antennas (RP-SMA)
- 1× USB 3.0 extension cable
- 1× Driver CD (Windows)
常見問題
Why is AWUS036ACM the only ALFA adapter that supports IBSS/Mesh?
Its mt76x2u driver is built on Linux mac80211, which fully exposes IBSS and Mesh Point interface types. Other ALFA models use out-of-tree drivers that do not include these modes.
What is the difference between IBSS Ad Hoc and 802.11s Mesh?
IBSS is a peer-to-peer network with no central AP, where all nodes must be in direct communication range. 802.11s has HWMP automatic multi-hop routing and self-healing, extending beyond single-hop range.
Does AWUS036ACM need driver installation on Raspberry Pi?
No. The mt76x2u driver has been in the mainline kernel since 4.19. Raspberry Pi OS versions from 2020 onward are plug-and-play with no installation steps.
Does IBSS mode support WPA2 encryption?
Linux kernel IBSS mode does not support standard WPA2-Personal. For secure connections, use application-layer encryption like WireGuard or OpenVPN. 802.11s supports SAE.
How do I make a Mesh network persist across reboots?
Virtual interfaces created via iw do not survive reboot. Create a systemd service (like mesh-point.service) to rebuild the interface and join the Mesh at boot.
Summary#
| Feature | AWUS036ACM |
|---|---|
| Chipset | MediaTek MT7612U |
| WiFi | AC1200 (867 + 300 Mbps), dual-band |
| IBSS Ad Hoc | ✅ All Raspberry Pi OS versions from 2020 |
| 802.11s Mesh | ✅ Plug & play |
| In-kernel driver | ✅ mt76x2u (since kernel 4.19) |
| Plug & Play on Pi | ✅ No installation needed |
| Detachable antennas | ✅ 2× 5 dBi RP-SMA |
| Only active ALFA model with IBSS + Mesh | ✅ Yes |
If you need to build a wireless network between Raspberry Pi nodes — whether a two-device direct link or a multi-hop self-healing mesh — the ALFA AWUS036ACM is the adapter that makes it work.
Article by the Yupitek Technical Team · yupitek.com
References: Alfa Network Official Documentation · Linux Wireless Wiki — Interface Types · MediaTek mt76 Linux Driver · morrownr USB-WiFi In-Kernel List