- Yopitek Ltd/
- Blog/
- ALFA AWUS036ACH Setup Guide for Kali Linux: Monitor Mode & Packet Injection (2026)/
ALFA AWUS036ACH Setup Guide for Kali Linux: Monitor Mode & Packet Injection (2026)
Table of Contents
Most people hit three walls when setting up the AWUS036ACH on Kali: the driver won’t compile, the VM won’t pass through the USB device, or monitor mode silently fails. This guide covers all three, plus the full working setup from scratch.
Why the AWUS036ACH Is the Go-To Choice#
Before diving into commands, it’s worth understanding exactly what makes this adapter special.
The RTL8812AU Chipset
Realtek’s RTL8812AU is a dual-band (2.4 + 5 GHz) 802.11ac chipset with robust support for the frame-level operations that security tools require. The open-source driver maintained at aircrack-ng/rtl8812au on GitHub is the direct result of years of collaboration between the Aircrack-ng team and the broader Linux security community. It is actively maintained, regularly tested against new kernel versions, and has explicit support for monitor mode and packet injection baked in — not as an afterthought.
Community Support Since 2017
When you run into a problem with the AWUS036ACH, you’ll find answers. The adapter appears in thousands of forum posts, YouTube tutorials, Hack The Box walkthroughs, Offensive Security course materials, and GitHub issues. The troubleshooting knowledge base is unmatched by any other adapter.
AC1200 Dual-Band Performance
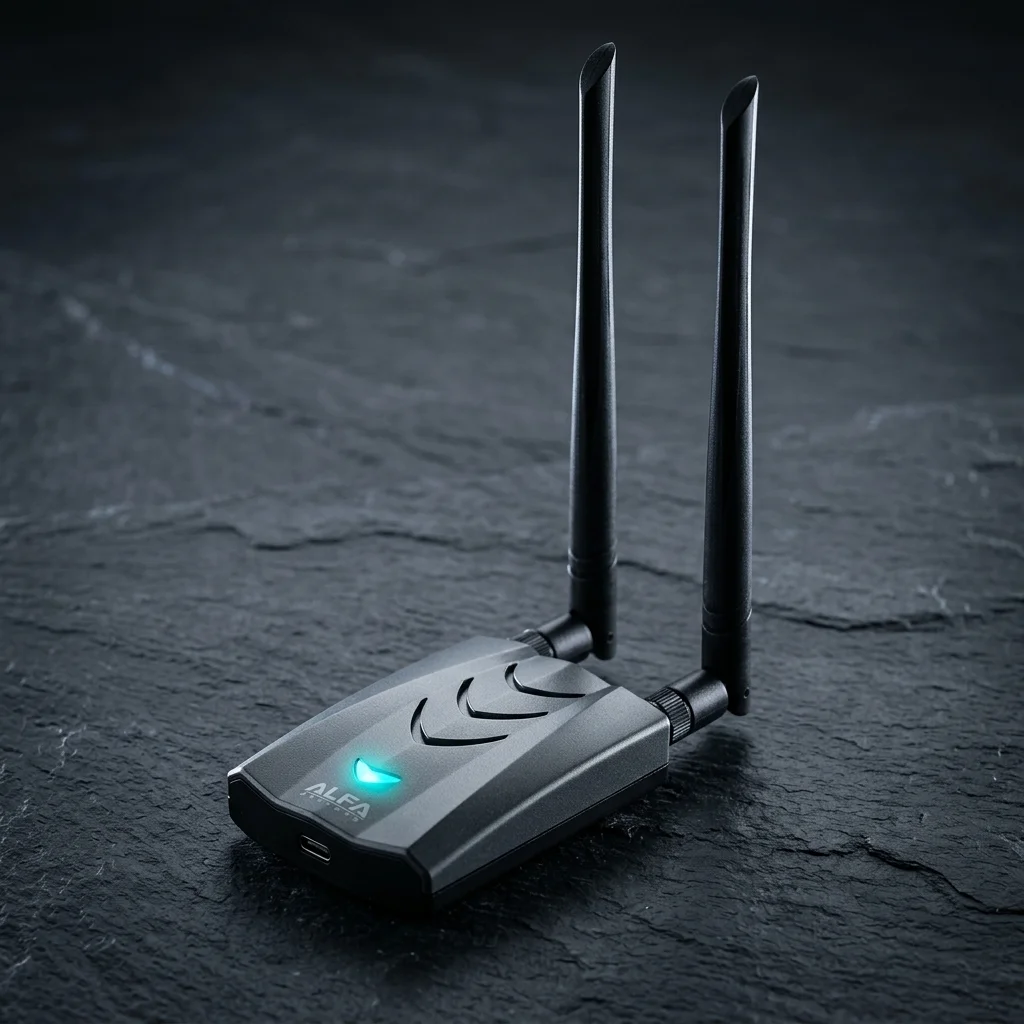
The adapter delivers up to 300 Mbps on 2.4 GHz and 867 Mbps on 5 GHz, with two detachable RP-SMA antennas supporting 2×2 MIMO. You get genuine high-throughput performance when you need it, alongside full pentesting capability.
USB 3.0
The USB 3.0 interface prevents the adapter from becoming a bottleneck during high-bandwidth captures or when running multiple concurrent tools.
You can find it in our store: ALFA AWUS036ACH.
Prerequisites#
Before starting, confirm the following:
- Kali Linux 2024.x or later (this guide is tested on Kali 2024.1 through 2025.1)
- A USB 3.0 port — while the adapter works on USB 2.0, throughput is limited. Use USB 3.0 for best results.
- Internet connection for downloading the driver
- Root or sudo access
- Build tools installed — covered in Step 2
If you’re running Kali in a virtual machine (VMware, VirtualBox, UTM), you must pass the USB device through to the VM. In VMware: VM → Removable Devices → connect your adapter. In VirtualBox: Settings → USB → add a USB filter for the Realtek device.
USB Passthrough in VirtualBox and VMware#
VirtualBox#
VirtualBox requires the Extension Pack for USB 3.0 support. Without it, you can only pass through USB 2.0, which causes silent failures or reduced throughput with the AWUS036ACH.
- Download the Extension Pack from virtualbox.org/wiki/Downloads — it must match your VirtualBox version exactly
- Install: File → Tools → Extension Pack Manager → Install
- In your Kali VM settings: USB → Enable USB Controller → USB 3.0 (xHCI)
- Add a USB Device Filter with the adapter connected: Settings → USB → click the “+” icon
# Verify the adapter is visible inside the VM
lsusb | grep -E "0bda|Realtek"
# Expected: Bus 002 Device 003: ID 0bda:8812 Realtek Semiconductor Corp.
VMware Workstation / Player#
VMware handles USB passthrough better than VirtualBox by default, but the VMware USB Arbitrator service must be running on the host:
# Windows host — verify the service is running
sc query VMwareUSBArbitrator

# If stopped:
sc start VMwareUSBArbitrator
In the VM: VM menu → Removable Devices → ALFA AWUS036ACH → Connect
# Confirm success inside Kali
lsusb | grep -E "0bda|Realtek"
dmesg | tail -10
Step 1: Connect the Adapter and Verify Detection#
Plug the AWUS036ACH into a USB port and run:
lsusbYou should see an entry similar to:
Bus 001 Device 004: ID 0bda:8812 Realtek Semiconductor Corp. RTL8812AU 802.11a/b/g/n/ac 2T2R DB WLAN AdapterThe important identifiers are:
- Vendor ID:
0bda(Realtek) - Product ID:
8812(RTL8812AU)
If the device does not appear at all, try a different USB port or cable. If it appears with a different product ID, you may have a different hardware revision.
Also check the kernel message log immediately after plugging in:
dmesg | tail -20If the driver is already loaded (unlikely on a fresh Kali install), you’ll see lines like:
usb 1-1: new high-speed USB device number 4 using xhci_hcd
usbcore: registered new interface driver rtl88XXau
Without the driver installed, you’ll see the USB device detected but no interface created.
Step 2: Install the RTL8812AU Driver#
There are two installation methods. Method A (aircrack-ng driver) is recommended for Kali Linux. Method B (DKMS) is recommended if you want the driver to persist automatically across kernel updates.
Install Build Dependencies#
Both methods require the same dependencies:
sudo apt update
sudo apt install -y \
    git \
    dkms \
    build-essential \
    libelf-dev \
    linux-headers-$(uname -r)
This installs the kernel headers matching your currently running kernel, which the driver build process requires.
Method A: Direct Install (aircrack-ng driver — Recommended for Kali)#
# Clone the aircrack-ng maintained driver
git clone https://github.com/aircrack-ng/rtl8812au
cd rtl8812au

# Build the driver
make

# Install the driver
sudo make install

# Load the driver module
sudo modprobe 88XXau
Verify the module loaded:
lsmod | grep 88XXauExpected output:
88XXau               3461120  0
cfg80211             1081344  1 88XXau
A wireless interface should now appear:
ip link show
# or
iwconfig
You should see a new interface — typically wlan0 or wlan1 if you have other wireless interfaces.
Method B: DKMS Installation (Persistent Across Kernel Updates)#
With standard make install, the driver module is compiled for your current kernel only. If Kali updates the kernel (which happens regularly via apt upgrade), the driver stops working until you recompile.
DKMS (Dynamic Kernel Module Support) solves this by automatically recompiling the driver whenever a new kernel is installed.
git clone https://github.com/aircrack-ng/rtl8812au
cd rtl8812au

# Use the DKMS install script
sudo make dkms_install
Alternatively, manual DKMS registration:
# Get the driver version
grep MODULE_VERSION Makefile | head -1
# Example output: v5.6.4.2

# Copy source to DKMS directory
sudo cp -r ../rtl8812au /usr/src/rtl8812au-5.6.4.2

# Register with DKMS
sudo dkms add -m rtl8812au -v 5.6.4.2
sudo dkms build -m rtl8812au -v 5.6.4.2
sudo dkms install -m rtl8812au -v 5.6.4.2
Verify DKMS registration:
dkms status
# Expected: rtl8812au/5.6.4.2, 6.x.x-kali-amd64: installed
Step 3: Enable Monitor Mode#
With the driver loaded and the interface visible, you’re ready to enable monitor mode.
Method A: airmon-ng (Recommended)#
First, kill any processes that might interfere with monitor mode:
sudo airmon-ng check killThis stops NetworkManager, wpa_supplicant, and other daemons that hold the interface. Expected output:
Killing these processes:
  PID Name
  1234 NetworkManager
  1235 wpa_supplicant
Now start monitor mode:
sudo airmon-ng start wlan0Replace wlan0 with your actual interface name if different. Expected output:
PHY     Interface   Driver      Chipset
phy0    wlan0       88XXau      Realtek Semiconductor Corp. RTL8812AU

                (mac80211 monitor mode vif enabled for [phy0]wlan0 on [phy0]wlan0mon)
                (mac80211 station mode vif disabled for [phy0]wlan0)
The monitor mode interface is named wlan0mon.
Method B: iw (Manual)#
If you prefer not to kill NetworkManager, or if airmon-ng isn’t available:
# Bring the interface down
sudo ip link set wlan0 down

# Switch to monitor mode
sudo iw dev wlan0 set type monitor

# Bring it back up
sudo ip link set wlan0 up
To specify a channel while enabling monitor mode:
sudo iw dev wlan0 set channel 6Step 4: Verify Monitor Mode#
Confirm the interface is in monitor mode:
iwconfigLook for the wlan0mon (or wlan0) entry. It should show:
wlan0mon  IEEE 802.11  Mode:Monitor  Frequency:2.457 GHz  Tx-Power=20 dBm
          Retry short limit:7   RTS thr:off   Fragment thr:off
          Power Management:off
The key indicator is Mode:Monitor. If it shows Mode:Managed, monitor mode is not active.
You can also use:
iw dev wlan0mon infoExpected output includes:
type monitorVerify with Airodump-ng#
Run a quick scan to confirm the adapter is capturing traffic:
sudo airodump-ng wlan0monYou should immediately see WiFi networks appearing in the output. Press Ctrl+C to stop.
Step 5: Test Packet Injection#
Packet injection is the ability to transmit arbitrary 802.11 frames. Use aireplay-ng’s injection test:
sudo aireplay-ng --test wlan0monThis broadcasts test frames and listens for responses from nearby access points. A successful result looks like:
15:42:11  Trying broadcast probe requests...
15:42:11  Injection is working!
15:42:12  Found 3 APs

15:42:12  Trying directed probe requests...
15:42:12  aa:bb:cc:dd:ee:ff - channel: 6 - 'HomeNetwork' - 30/30: 100%
15:42:13  11:22:33:44:55:66 - channel: 11 - 'OfficeWiFi' - 28/30: 93%
The percentage indicates successful injection rate. Anything above 80% for nearby APs is acceptable. 100% is typical when you’re within range.
If you see Injection is working! in the output, your setup is complete and ready for use with the full Aircrack-ng suite.
Dual-Band Injection Test (5 GHz)#
To test injection on 5 GHz, specify the channel:
# Switch to a 5 GHz channel (e.g., channel 36)
sudo iwconfig wlan0mon channel 36
# or
sudo iw dev wlan0mon set channel 36

# Run injection test
sudo aireplay-ng --test wlan0monTroubleshooting#
“Interface not found” / No wlan interface after driver install#
Cause: The driver module didn’t load successfully.
Solution:
# Check for module load errors
dmesg | grep -i 88XX
dmesg | grep -i rtl

# Try manually loading the module
sudo modprobe 88XXau

# If modprobe fails, check for missing dependencies
modinfo 88XXau

# Rebuild the driver
cd rtl8812au
make clean && make && sudo make install
Also confirm your kernel headers match your running kernel:
uname -r
ls /lib/modules/$(uname -r)/build
If the build directory doesn’t exist, reinstall headers:
sudo apt install linux-headers-$(uname -r)“Operation not permitted” when enabling monitor mode#
Cause: You’re not running as root, or a capability is missing.
Solution:
Always use sudo with airmon-ng and aireplay-ng:
sudo airmon-ng start wlan0
sudo aireplay-ng --test wlan0mon
If running as root already, confirm your Kali user is actually root:
whoami
# Should output: root
“No module named rtl8812au” / DKMS fails after kernel update#
Cause: DKMS didn’t recompile the driver for the new kernel.
Solution:
# Check DKMS status
dkms status

# If rtl8812au shows as "built" but not "installed" for the new kernel:
sudo dkms install rtl8812au/5.6.4.2 -k $(uname -r)

# If that fails, remove and reinstall:
sudo dkms remove rtl8812au/5.6.4.2 --all
cd /path/to/rtl8812au
sudo make dkms_install
Monitor mode starts but no traffic captured#
Cause: Wrong channel, interference, or regulatory domain issue.
Solution:
# Check current channel
iwconfig wlan0mon

# Manually set channel
sudo iwconfig wlan0mon channel 1

# Check regulatory domain
iw reg get

# Set permissive regulatory domain (use responsibly)
sudo iw reg set BO
Low injection success rate (below 50%)#
Cause: Distance from AP, interference, or power management issue.
Solution:
# Disable power management on the interface
sudo iwconfig wlan0mon power off

# Increase TX power (check local regulations before using)
sudo iw dev wlan0mon set txpower fixed 3000  # 30 dBm
Restore Managed Mode#
When you’re done with testing and want to reconnect to networks normally:
sudo airmon-ng stop wlan0mon
sudo systemctl start NetworkManager
Or with iw:
sudo ip link set wlan0 down
sudo iw dev wlan0 set type managed
sudo ip link set wlan0 up
sudo systemctl start NetworkManager
常見問題
Does AWUS036ACH need extra drivers on Kali Linux?
Yes. RTL8812AU is not a mainline kernel driver. Install it from the aircrack-ng GitHub repository. DKMS is recommended to survive kernel updates.
How do I confirm AWUS036ACH is detected by the system?
Run lsusb and look for ID 0bda:8812 to confirm the Realtek RTL8812AU is recognized. Then use lsmod to verify the driver module is loaded.
What should I do if the interface disappears after enabling monitor mode?
Usually NetworkManager retook the interface. Run airmon-ng check kill to stop interfering processes, then re-enable monitor mode.
What packet injection success rate is considered normal?
Above 80% means reliable operation. Below 50% suggests checking antenna position, USB power, or driver installation.
How do I fix AWUS036ACH driver failure after a kernel update?
If installed via DKMS, the driver rebuilds automatically. If it fails, run dkms autoinstall and make sure linux-headers match the current kernel version.
Summary#
| Step | Command |
|---|---|
| Check detection | lsusb | grep Realtek |
| Install dependencies | sudo apt install git dkms build-essential linux-headers-$(uname -r) |
| Clone driver | git clone https://github.com/aircrack-ng/rtl8812au |
| Build & install | make && sudo make install |
| Load module | sudo modprobe 88XXau |
| Kill interfering processes | sudo airmon-ng check kill |
| Enable monitor mode | sudo airmon-ng start wlan0 |
| Verify monitor mode | iwconfig wlan0mon |
| Test injection | sudo aireplay-ng --test wlan0mon |
| Estimated time | ~15 minutes (clean system) |
The ALFA AWUS036ACH paired with Kali Linux 2024+ and the aircrack-ng RTL8812AU driver remains the most reliable, best-documented WiFi adapter setup in the penetration testing community. Once you’ve verified injection is working, you’re ready to use the full Aircrack-ng suite, Wireshark, Kismet, Bettercap, and any other tool that requires monitor mode or packet injection.